ARRI Completes Alexa SXT, Adds to SkyPanel, Master Grips, and More

In the wake of IBC 2016, ARRI has new announcements in lighting, camera, and accessory lines.
Lights

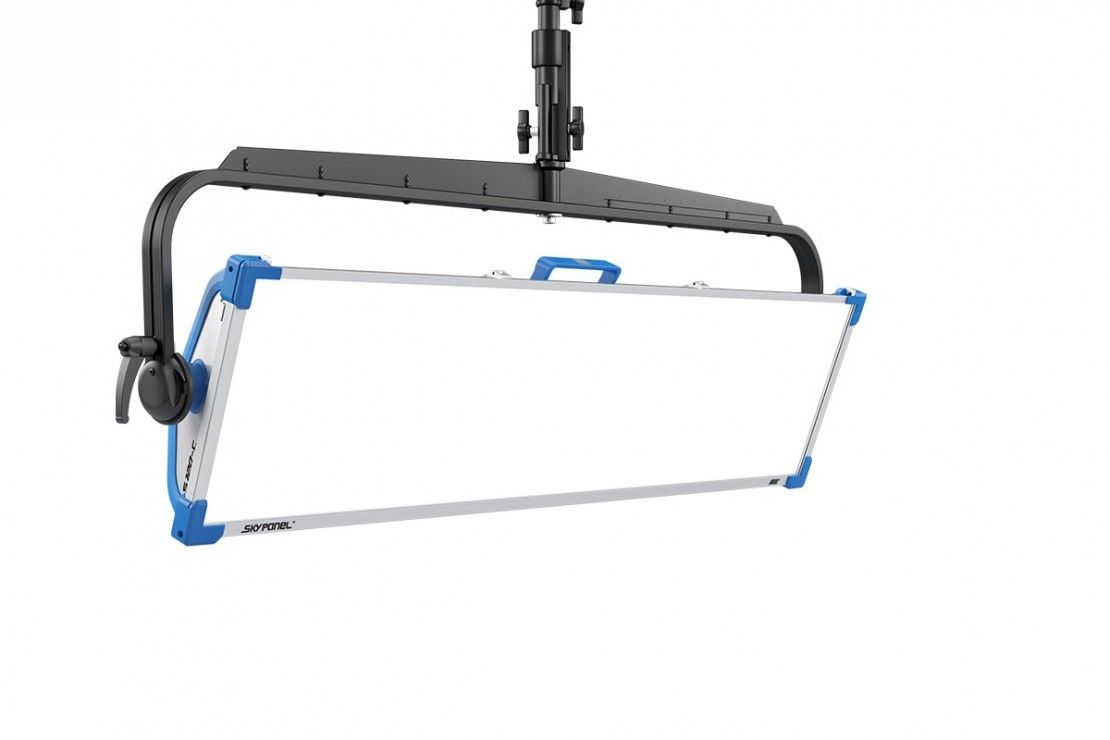
SkyPanel LED gets a new edition with the S120-C, its biggest fixture to date. Joining the S60 and S30 family, the S120-C is twice as long as the S60 but weighs nearly the same. The S120 outputs a soft, even beam of light with an aperture of 50.8” x 11.8” (1290mm x 300mm) and consumes less than 400 watts. It is slightly brighter than the S60-C and has an efficacy of 9 lumens per watt.

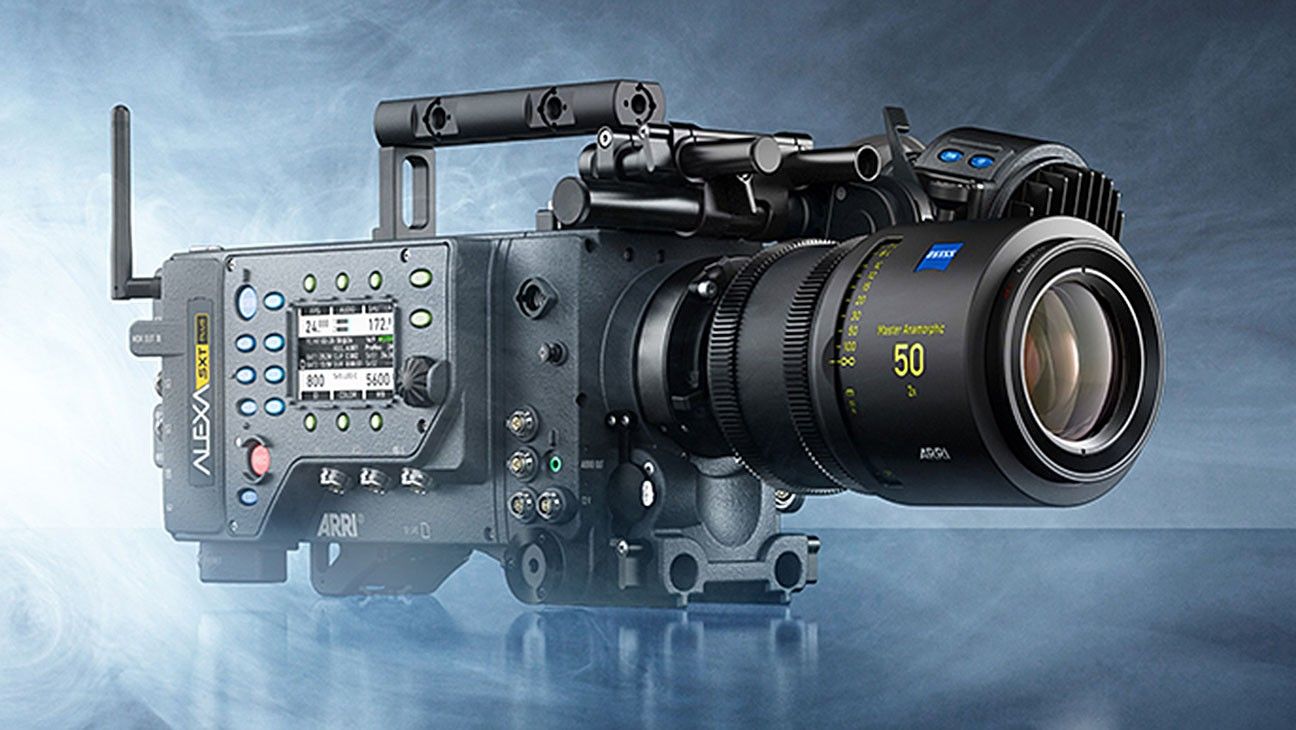
ARRI claims to have completed the development of the Alexa SXT cameras (Super Xtended Technology).​​

The fully tuneable LED adjusts from 2,800 K to 10,000K with high color rendering and is dimmable from 0 – 100%. The thin profile of the S120 offers DMX control, onboard battery options, an EtherCon port for network connectivity, and a USB connection for updates. As you might imagine, ARRI has also released all the necessary accessories with the fixture: honeycombs, egg crates, barn doors, diffusion panels, and a new fabric barn door dubbed the FlexDoor.
Features

Vibrant Color Selection (RGB+W Color Gamut)
High Color Rendering
Large Aperture (1290 x 300mm)
Low Power Consumption (400 W Nominal)
Tremendous Output – Brighter than 2kW Tungsten Soft Light
Lightweight and Compact
Interchangeable Diffusion Panels
On-Board Battery Connection (23 – 36V DC)
RDM Implementation
Available in Blue/Silver and Black
Fan Mode Selection

Camera

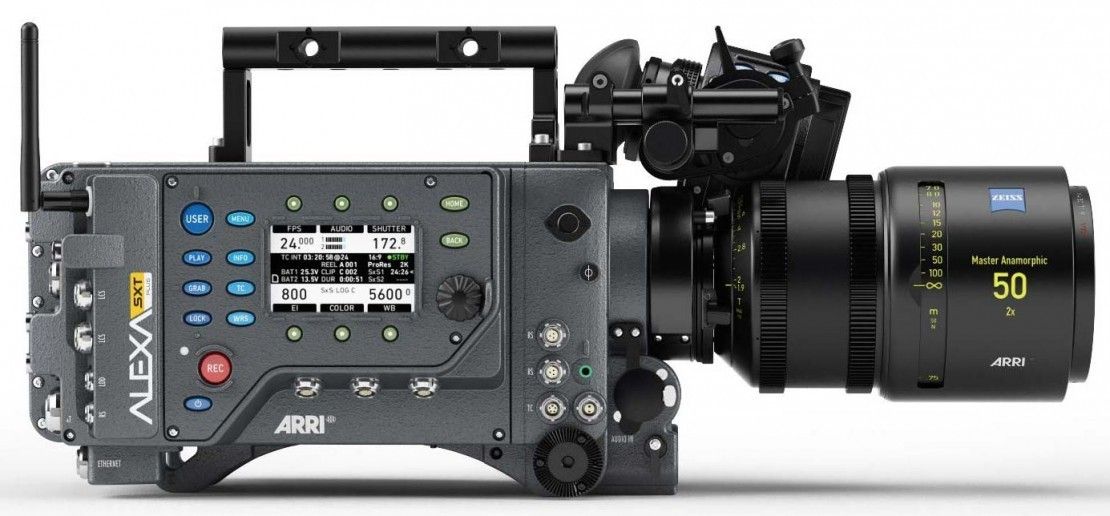
Good news for all Alexa XT EV, XT Plus, and XT Studio camera users: ARRI claims to have completed the development of the Alexa SXT cameras (Super Xtended Technology). For those who bought the cameras in 2015 and 2016, you can now upgrade completely free of charge to SXT at seven different locations including Munich, London, Los Angeles, New York, Beijing, Hong Kong, and Mumbai. If you happened to receive your XT prior to 2015, there is a paid option to upgrade to the full SXT version.

While SXT keeps the same sensor and user interface of the original Alexa design, its capabilities have been greatly extended. It’s now equipped with better electronics and a more sophisticated image processor that aligns with the Alexa 65. The SXT cameras can also manage more recording formats (HD, 2K, 4K UHD, or 4K Cine) with 16-bit in-camera processing up to 120fps. The SXT can also record a WCG (Wide Color Gamut) with images ready for color space standards like Rec 2020.

In addition to being able to record HDR, you can now also monitor in HDR. There’s also a new media bay that can accept SxS PRO cards, SxS PRO+ cards, CFast 2.0 cards, XR capture drives, and SXR capture drives.
Accessories

As part of the ECS (Electronic Control System) line, ARRI has announced four new Master Grip handgrips to provide full control of focus, iris, and zoom settings on cine lenses, including adjustable motor speed, zoom response, and motor limits.

Based on the classic ARRIFLEX handgrips, they can be mounted on tripod pan arms or studio pedestal heads. The Master grips can be used as focus and zoom demands for multi-camera setups with camera control functions, including user button access and record start/stop for ARRI and third-party cameras.

ARRI Master Grips
Combining camera stabilization with lens and camera control, they’re available in right-side and left-side grips with either a rocker for smooth zooming or a thumb wheel for iris or focus control.

Master Grip Left Wheel MLW-1

Left-side camera handgrip
Assignable user buttons and a finger wheel for iris or focus adjustments.
Includes a steel ARRI rosette and two LBUS interfaces

Master Grip Right Wheel MRW-1

Right-side camera handgrip
Assignable user buttons and a finger wheel for iris or focus adjustments
Includes a steel ARRI rosette and two LBUS interfaces

Master Grip Left Rocker MLR-1

Left-side camera handgrip
Assignable user buttons and a control rocker for super-smooth zooming
Includes a steel ARRI rosette and two LBUS interfaces

Master Grip Right Rocker MRR-1

Right-side camera handgrip
Assignable user buttons and a control rocker for super-smooth zooming
Includes a steel ARRI rosette and two LBUS interfaces

Want to Be a Steadicam Operator? Start With These 5 Tips

There’s no better way to learn Steadicam than to practice, but you need to begin with the basics.

Steadicam operating is a true craft that can take a lifetime to master. I’ve been Steadicam operating for over seven years and I’m still always learning, honing, and practicing my technique.

With the advent of gimbals, Steadicams have taken a back seat for many of today’s filmmakers, but I believe they remain the right tool for the right job. Gimbals are new and exciting tech but not a full 360 solution. And while I think the future is a hybrid of the two, there is still a reason to understand the basics of flying and operating the Steadicam.

When I first started out, I read books, watched Youtube videos, and searched forums—but there just wasn’t enough out there for me to grasp the basic operating concepts. With the high cost of entry coupled with the specialized aspects of operating, Steadicams are one of those true craftsman skills that you just can’t learn completely online. That being said, I will share some basic tips here that will give you the fundamental understanding you need to get started. By no means will you be up and running with these tips, but hopefully this will inspire you to discover your own best path to flying.

“My first Steadicam, a Tiffen Pilot, had me strapped in velcro, which was weird, but totally enough.”

1. Know the parts

GPI PRO TITAN ARM
GPI Pro Titan Arm
The arm. For me, the arm is the heart of the Steadicam. The arm becomes an extension of your body, connection to the sled, and is the central stabilizer for all movements. The arm usually consists of two segments that are supported by springs. While they all do basically the same thing, arms vary in size, strength, and price.

Tiffen Steadicam M1 sled
The sled. The sled is the vessel that becomes one with the camera rig. Camera, matte box, follow focus, power, monitor, all become a part of the sled, much like a tripod. The sled consists of a top stage, arm, monitor, battery rack, and gimbal. Ultimately, the sled has to balance on the gimbal to achieve dynamic balance (which we will get into later). While the sled must be robust enough to carry up to 80 lbs., it must also have hairline precision.

Aliens M56 smartgun with Steadicam bodymount
The vest. The vest connects your body to the arm, which connects to the sled, which makes you look like one gigantic cyborg looking bad ass. In the beginning, when cameras were over 50 lbs., the vests were just as robust, but as cameras have gotten lighter, so has the tech on the vests. Ultimately, the vest allows the weight and momentum of the rig to be placed on the body which has lot more power than your arms. My first Steadicam, a Tiffen Pilot, had me strapped in velcro, which was weird, but totally enough.

2. Understand balance and drop time

There are three aspects that I find to be the most important when balancing a sled: dynamic balance, drop time, and horizon. But what does balancing a sled even mean? Well, the sled must be able to achieve a neutral balance at the point of the gimbal on the sled so that when there is lateral movement, the camera floats effortlessly. How does one achieve this?

First, you need to position the camera, power, monitor, accessories and gimbal position on the sled to achieve dynamic balance. Basically, you need to get the all the elements of the sled on the top and the bottom to be balanced with the adjustable gimbal. This is done with major and minor adjustments on the top stage and bottom stage.

Next, Drop time, which is the amount of time the sled will drop from horizontal to vertical on the gimbal. You place the sled on a solid, beefy baby to fine tune the gimbal post position on the arm. The goal is to get a drop time of about 3 seconds. This will allow the operator the best options for flying.

I know all of this is hard to visualize, but doing it and seeing it in real life will answer all your questions.
3. When flying, let the rig do the work

Flying the rig is actually quite simple. Strap the vest on, attach the arm to the vest, then throw the sled on the arm. Rest your hand on the gimbal arm, and with your other hand feather the gimbal grip.

My main advice for the beginner is to let the rig do the work. The initial intuition is to control the rig and fight the springs and movements. The Steadicam is an ingenious invention, but true control is built around allowing the rig to do the work.

I could write pages about the movements, but you probably won’t get it until you try it on. Flying a Steadicam is much like riding a bike. There is nothing better to help you understand it than to just go ahead and try it.
4. Be diligent about mastering your skills

The one thing I’ll say about Steadicam is that it’s a tool, and a tool is useless if you don’t know how to work it properly. Read this book,The Steadicam Operator’s Handbook. Find a mentor, like I did with one of the best steadicam ops I know, BJ McDonnell, who gave me my first lesson. Take a class. Develop the right habits. Then, practice forever.
5. Consider investing in gear

Steadicams are expensive, and the initial investment is always tremendous. The pro gear rigs can cost upwards of 80K, while the smaller ones can cost 1-2K. My first Steadicam was a Tiffen Pilot and, although that was a major purchase, I couldn’t fly anything bigger than DSLR. At the time it was fine, but as time went on, I upgraded to a Steadicam Zephyr. While the Zephyr can’t fly the big rigs, it can fly most of the cameras that I get jobs for with a max camera weight of 25 lbs.

There are a multitude of rigs out there and I’ll do a big review of those on No Film School. Like cameras, they all have their quirks like cameras but fundamentally they all do the same thing. Find the rig that you can afford and see if you even enjoy the process. Steadicam is not for everyone and its a big commitment. I find the steadicamforum.com a great resource for user reviews on all the rigs out there.

We don’t view the world in handheld. We see it in a balanced, dynamic, mobile perspective. The Steadicam enhances this perspective and creates a visual that is unique and special.

At about 16:00 in of this video, you can see me showing the basics of flying the rig.